Kali Linux developers and Offensive Security team is always trying to find new ideas and better ways to run Kali Linux. With the recent introduction of Windows Subsystem for Linux (WSL) in Windows 10, it opened a new way to run Kali Linux. Tell me, do you play games? Sure. Do you use Windows more than Kali Linux? NVM, you don’t to answer that. But the point is, if you need Windows and Kali Linux, would you like to install Kali Linux as a Windows Subsystem within Windows 10 (like a software in Windows!). With the Windows Subsystem for Linux Distribution Switcher utility now it’s possible to install Kali Linux on Windows Subsystem for Linux, just like Ubuntu.
Kali on the Windows Subsystem for Linux
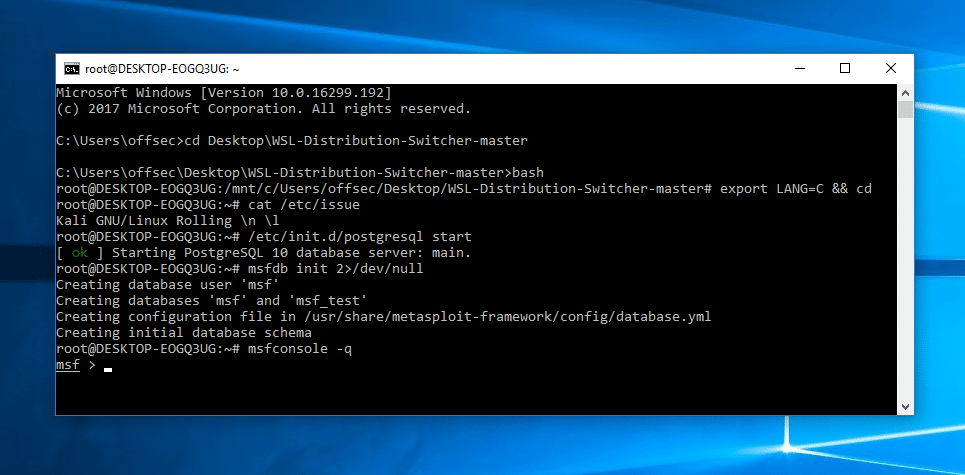
This setup of Kali on Windows is not optimal due to various environmental restrictions (such as the lack of raw sockets and lack of customised Kali kernel), there are still many situations where having Kali Linux alongside your Windows 10 machine can be beneficial. One example that comes to mind is consolidation of workspaces, especially if Windows is your main working environment. Other useful situations that crossed our minds were standardizing tools and scripts to run across multiple environments, quick porting of Linux penetration testing command line tools to Windows, etc. For example, below is a screenshot of running the Metasploit Framework from Kali Linux, over WSL.
Setting up the Environment
While the setup is described well over at the WSL Distribution Switcher README file, we’ve made a quick 4-minute video to walk you through the setup and installation process. For an easier copy / paste operation, these are the basic steps taken:
- Update your Windows 10 machine. Open an administrative PowerShell window and install the Windows Subsystem with this one-liner. A reboot will be required once finished.
Enable-WindowsOptionalFeature -Online -FeatureName Microsoft-Windows-Subsystem-Linux
- Once rebooted, open a command line shell and run the following commands to install the default Ubuntu environment. This will lay down the foundations for our Kali install.
lxrun /install
- Setup and install the WSL Switcher, download a Kali base, and extract it to disk:
git clone https://github.com/RoliSoft/WSL-Distribution-Switcher.git
cd WSL-Distribution-Switcher
python get-prebuilt.py kalilinux/kali-linux-docker
python install.py rootfs_kalilinux_kali-linux-docker_latest.tar.gz
lxrun /setdefaultuser root
- Now that Kali is set up on your Windows 10 machine, you can interact with it by running the “bash” command:
bash
- At this point, you’re inside Kali and you can use it as you normally do–install packages, use tools, etc. We strongly recommend first running an update and upgrade:
export LANG=C
apt-get update
apt-get dist-upgrade
Without further ado, here’s the video demonstration of the setup described above:
 blackMORE Ops Learn one trick a day ….


Hmm, well is it just me or does anyone else not trust windoz anywhere near there linux box?
Microsoft and windoz can go piss up a rope
For windows 10 there is a Kali app.
Do you think that it ‘s right that everybody can make use of the Kali/Distro?
I don’t think it’s a good plan that everybody even scriptkiddies can use it?
Maybe I’am mistaken?