This post will show how to create Kali Bootable Installer USB Drive in Windows 10 (Kali Bootable Non-Persistence USB Drive). This is the fastest method, for getting up and running with Kali Linux is to run it “live” from a USB drive. 
Advantages of using Kali Live USB Drive – Non-Persistence
- It’s non-destructive — it makes no changes to the host system’s hard drive or installed OS, and to go back to normal operations, you simply remove the “Kali Live” USB drive and restart the system.
- It’s portable — you can carry Kali Linux in your pocket and have it running in minutes on an available system.
- It’s secured – you can destroy the disk and there is no way to link anything back to that USB as the physical medium is destroyed.
- Best of all – You can boot any supported computers using it thus bypass OS security.
Disadvantages of using Kali Live USB Drive – Non-Persistence
- It’s once off – You can not update/upgrade distro.
- You can not save config.
Requirements
- A verified copy of the appropriate ISO image of the latest Kali build image for the system you’ll be running it on. i.e. note i386 or x64 or armel or armhf versions.
- A copy of Win32 Disk Imager utility.
- A USB thumb drive, 4GB or larger.
Creating a Bootable Kali USB Drive on Windows 10 – Non-Persistence
Downloading Kali Linux ISO image
You need to download an Official Kali Linux ISO image from here: https://www.kali.org/downloads/
Note that you need to ensure you know which system you will be running that image on. For example, if you want to use 32 bit Kali Linux you download Kali Linux 32 bit image. For 64-bit machines, download Kali Linux 64 bit image. This is very basic and you should already know it.
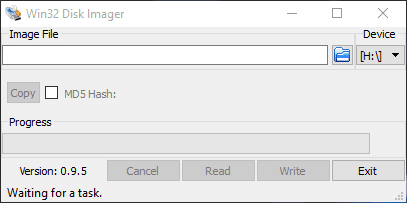
Win32 Disk Imager utility
Simple again, just download Win32 Disk Imager utility from SourceForge: http://sourceforge.net/projects/win32diskimager/files/latest/download and install it. However, I found an interesting issue with Windows 10 when running Win32 Disk Imager utility for the first time. It gave me an error and just b0mbed out on me. Easy fix though, you just need to run Compatibility troubleshooter and it will fix it almost instantly.
Click on the title below to expand the troubleshooting steps. Otherwise, just keep going through rest of the steps.
Fixing Win32 Disk Imager error in Windows 10
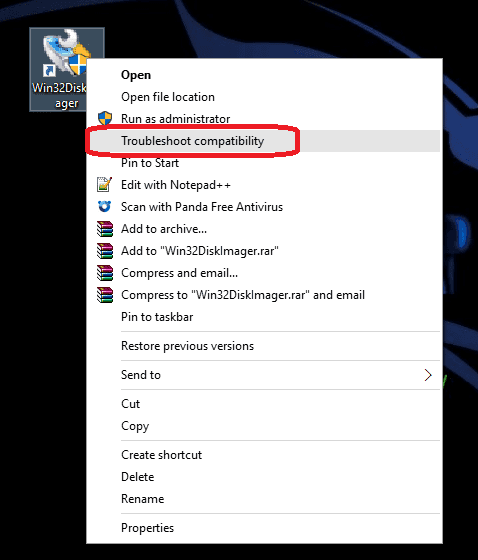
Right-click on Win32 Disk Imager shortcut icon and select “Troubleshoot compatibility”.
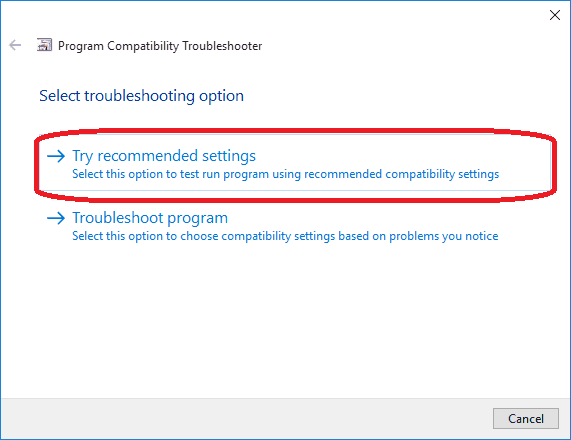
This will launch the wizard which will create few troubleshooting options for you. Click on “Try recommended settings”.
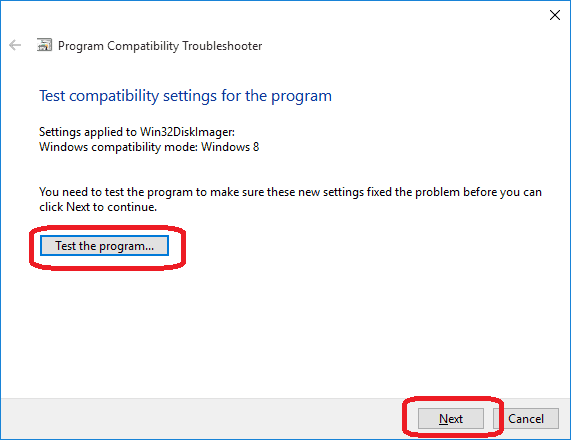
Next up, click on “Test the program” button.
Win32 Disk Imager should run at this point without any issues.
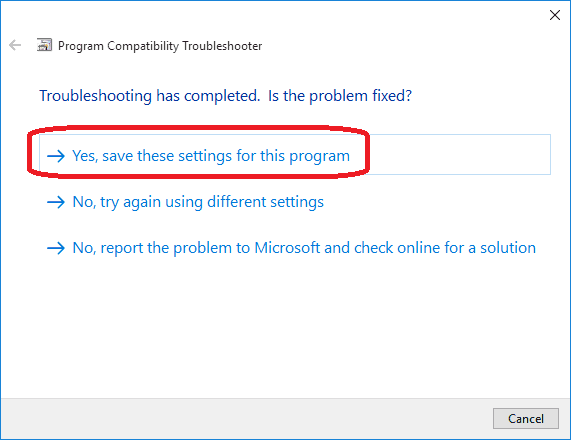
If that worked for you, you can save these settings by clicking on “Yes, save these settings for this program” option.
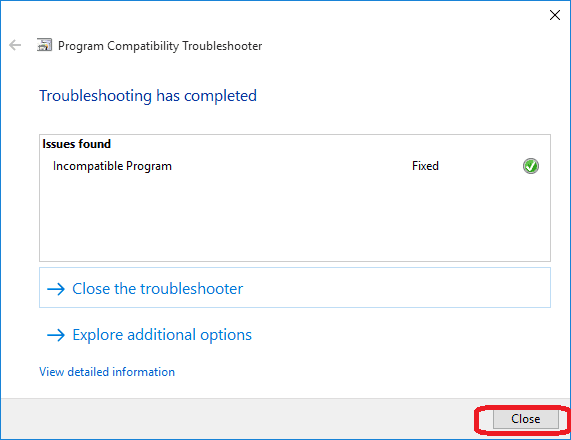
And finally close the Wizard by clicking on “Close” button.
asdfghj
Plug in USB drive and select ISO in Win32 Disk Imager
Now that Win32 Disk Imager is up and running, plug your USB drive into an available USB port on your Windows PC. Take a note of the Drive Letter (e.g. “H:\”) it uses once it mounts.
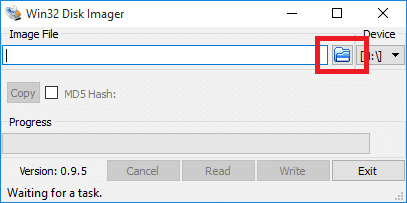
Click on the little “Folder” icon on Win32 Disk Imager to select your downloaded ISO file.
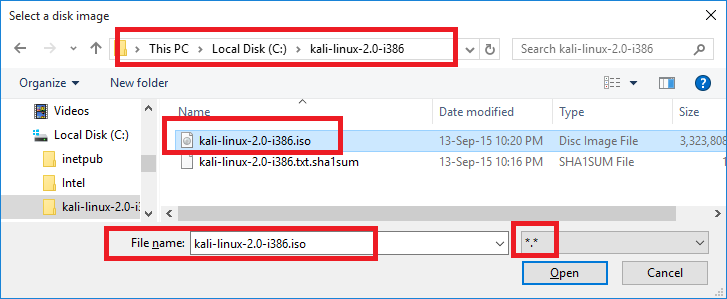
Browse and select the ISO file you downloaded. At first you won’t see the ISO file. Change the drop-down option to *.* (Next to “File name” box) to see the ISO file.
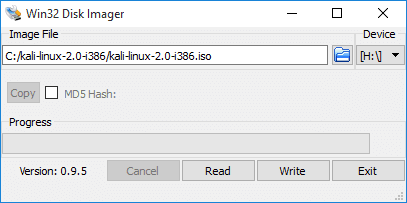
In my case, I am building this for a very old laptop which doesn’t support 64-bit, so I am using 32-bit Kali Linux ISO i.e. (kali-linux-2.0-i386.iso).
Highlight the file and select “Open” button.
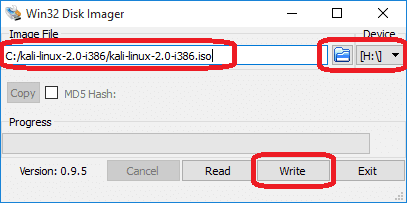
You should see something like “C:/kali-linux-2.0-i386/kali-linux-2.0-i386.iso” in the Image File location as shown below and the USB Drive letter (e.g. H:). Ensure you have the correct USB Drive selected in there. **** THIS IS A VERY IMPORTANT STEP ****
When ready and confirmed, click on the “Write” button.
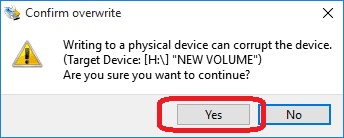
Immediately, you will have the following Pop-Up coming up to confirm your selection. Just make sure you selected the USB drive and press “Yes” button.
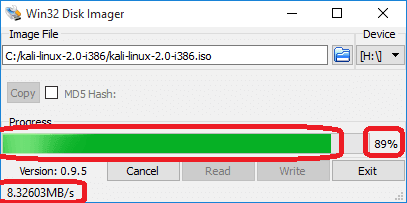
You will see a progress bar incrementing slowly. Just wait and relax.
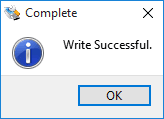
When all done, You will have the “Write Successful” popup coming up. Press “OK” to close it.
And finally press “Exit” to close Win32 Disk Imager.
Safely eject the USB drive from the Windows machine. Now you can use this USB device to boot into Kali Linux on any supported machine.
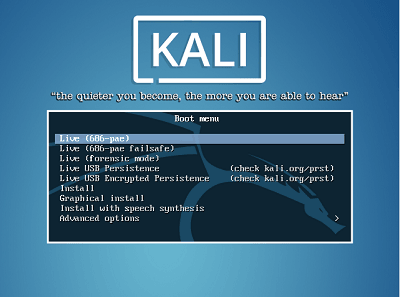
You need to select/change BIOS setup to select USB as the first boot device. When you have this following prompt,
Select Live (686-pae) or Live (amd64) or similar based on the ISO you’ve selected and off you go.
 blackMORE Ops Learn one trick a day ….

This is a great tutorial. I myself need to upgrade to kali from backtrack 5.
when i click on `write` option it shows me ` image file cannot be located on target device`
Hey I know I’m super late here but I just figured this out. If you have your iso file on the same usb you are trying to write to, it won’t work. Transfer to desktop and then write. You may need to use the troubleshooting option the author mentions above. (win 10)
It is easy to let Kali use the rest of your space on the thumb drive (create persistance ) – just google
“Creating Persistence On a Live Kali Linux Distro”. It helps if you are a bit familiar with gparted formatter.